1) Select your fabric. Slings can be made from a variety of fabrics. Choose something that is strong, durable, easy to wash, and something that you might actually like to wear. If you get something that is too stretchy, it will stretch out. I prefer brocades because they are a more grown-up fabric and they feel very strong. I also try to choose a fabric that is attractive on the inside as well since it will occasionally be visible. Purchase 2 to 2.5 yards of fabric. Remember, it's easy to make a ring sling smaller. It's very hard to make it larger. I would also suggest, with any sling, making sure you have a generous width of fabric to work with (buy something that is at least 60 inches wide so that when you cut it in half lengthwise you will still have a 30 inch width).
2) Order your rings. Once you know the color of your fabric, you can select rings to match. I prefer the medium-sized, aluminum sling rings from slingrings.com. Order at least two sets, since you will most likely have enough fabric to make two slings. One for you, one for a friend. Aren't you nice?!
3) Wash your fabric. If your fabric is likely to shrink, wash it first. If not, don't worry about it.
5) Cut your fabric. Lay your fabric out on the floor and fold it in half lengthwise (so that it is long and skinny).

Most fabrics are actually wide enough to give you enough to make TWO slings. Cut the fabric down the fold so that you end up with two long skinny lengths of fabric.

Fold up one and put it away for later (or make two at the same time, repeating each step).
6) Hem your fabric. Basically you just want to have finished edges. If you make your hem too big you are taking away from the overall fabric measurement and making your sling less stable.
If you are lucky enough to have or be able to purchase a rolled hem foot, use that. Here's a how-to. The smaller the hem the better, but it doesn't really need to be less than a 1/4 inch.
If not, you can do a standard rolled hem. Here's a how to (in pictures):
Start on a corner.

Now I usually eyeball this part, but if you want to be precise
then fold your edge over 1/4 inch and press it.

Then roll it 1/4 inch more.

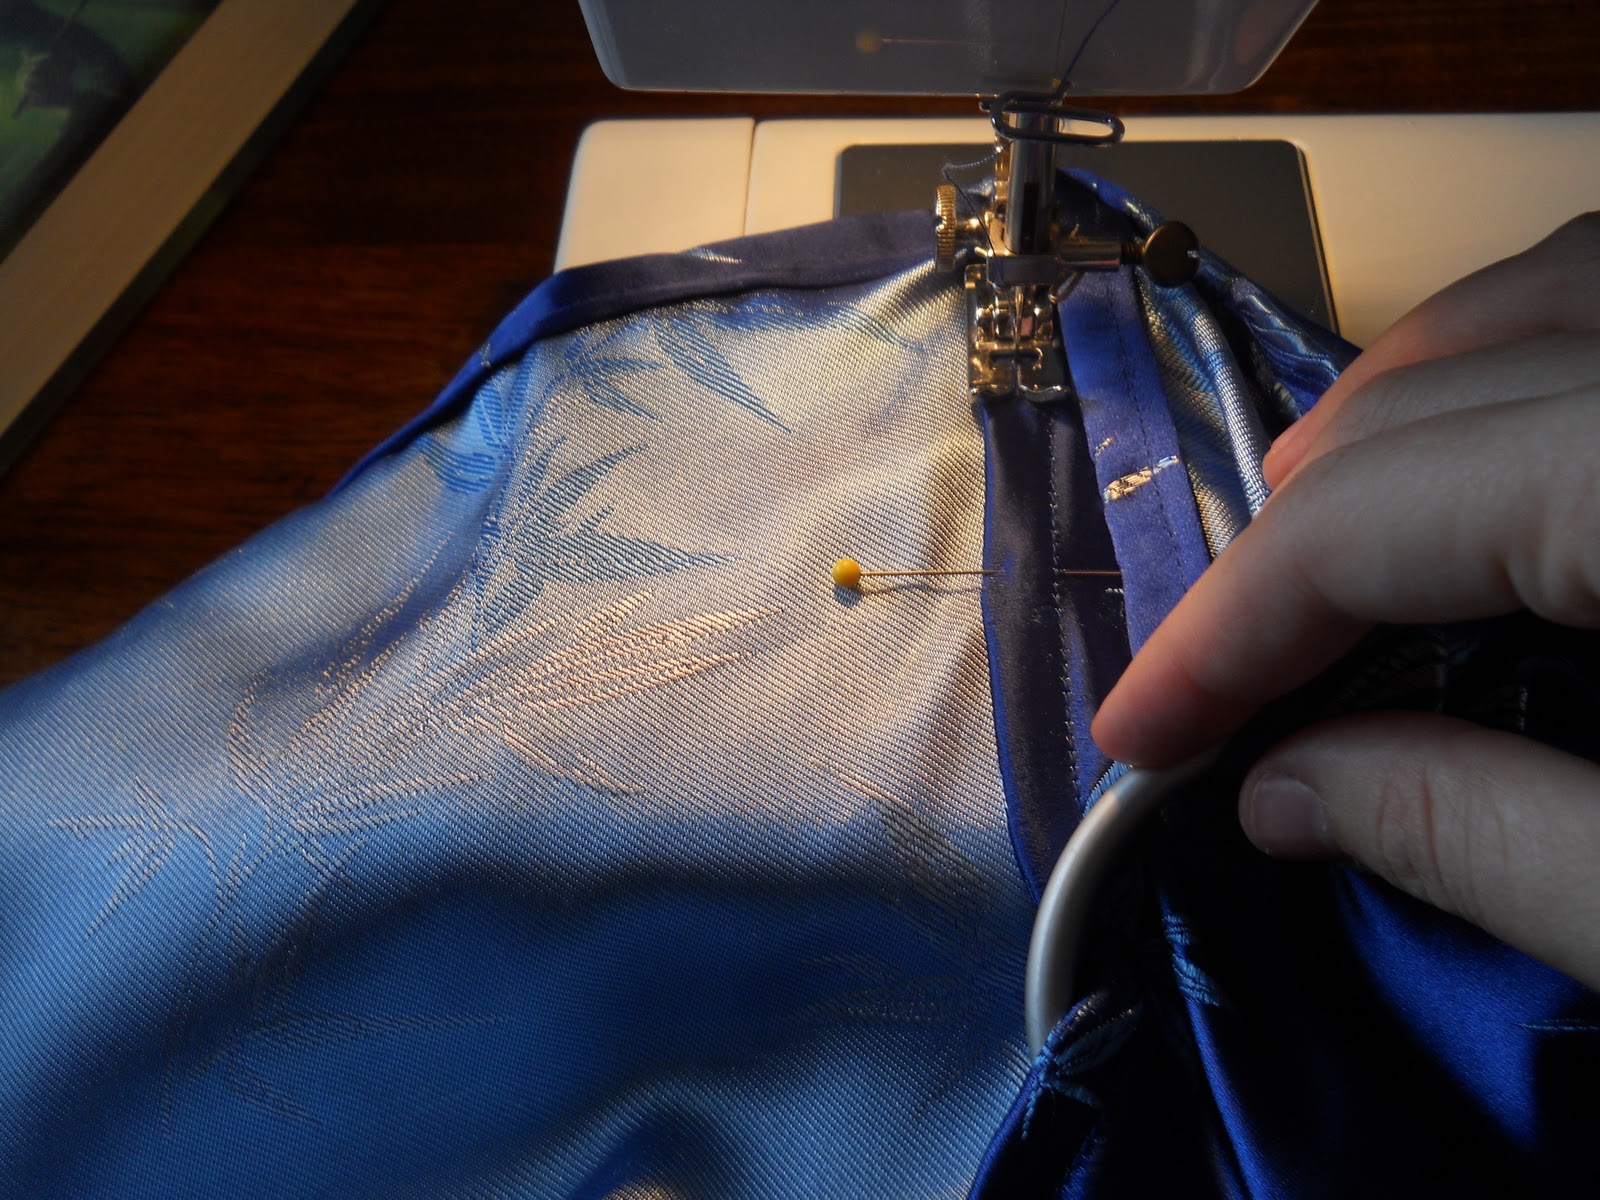
Pin it if you need to...

and sew it down.

Do this all the way around, even on the selveged edges.

This will create a rolled hem, a uniform look, and a nice finished edge.


7) Insert your sling rings. This is the tricky part.
Fold the short side of your fabric inward about 6-9 inches. You can measure the distance from the middle of your shoulder joint to what I would call "corsage position" on your chest.
Fold the short side of your fabric inward about 6-9 inches. You can measure the distance from the middle of your shoulder joint to what I would call "corsage position" on your chest.

Pin it in place
(you will want to do this, even if you don't normally pin something)

Here's the tricky part (so pay attention to the pictures).

Undo the first pin and slip the first part of both rings
in between the fabric, then re-pin it.

Begin sewing, careful to keep the rings out of the way.

When you can go no further (or it becomes difficult)
slip out the next pin, move the rings down, and re-pin.

Repeat as you move your way down the length of cloth.
Keep going. It's awkward, I know.

When you get to the last pin, remove it and pull the other end of the rings through

When you get to the end, your ends might be a little uneven.

Don't worry. Just fold the excess under and sew it down.
Don't forget to backstitch.
Now this part is VERY important!!
Go back and sew another row of stitching
about 1/4 inch away
from your previous stitching.
This will create two side-by-side rows of stitching
You do this to reinforce the seam.
Stronger seam. Safer baby. Got it?!
This is what you get
(a view from the inside - imagine more fabric to the left)!!!

Congratulations! You have made your Ring Sling!
Now to thread, adjust, and wear!


 Feel free to contact me with questions. I had to mess around with my ring sling a bit to get it to work and I would suggest fitting it to you and a doll, stuffed animal, etc. before putting your baby in it.